
The old school ARCH-install :> CHAD way
/ 7 min read
Table of Contents
ARCH-101 : the chad way
I finally decided to read the arch-install manual, after centuries of me using the install script, i decided to grow the fuck up :>
Goals
my aim is to have a baseline arch linux system with the following; Installing to a fresh machine (or seperate hard drive)
- a bootloader
- Only two partitions / and /boot/
- zram
- basic helper stuff
All that being said, make sure to reference the arch installation guide, This blog should be more-so considered my personal shittier version on how to go about each individual step, also don’t blame me if some fuck-up happens
letsBegin
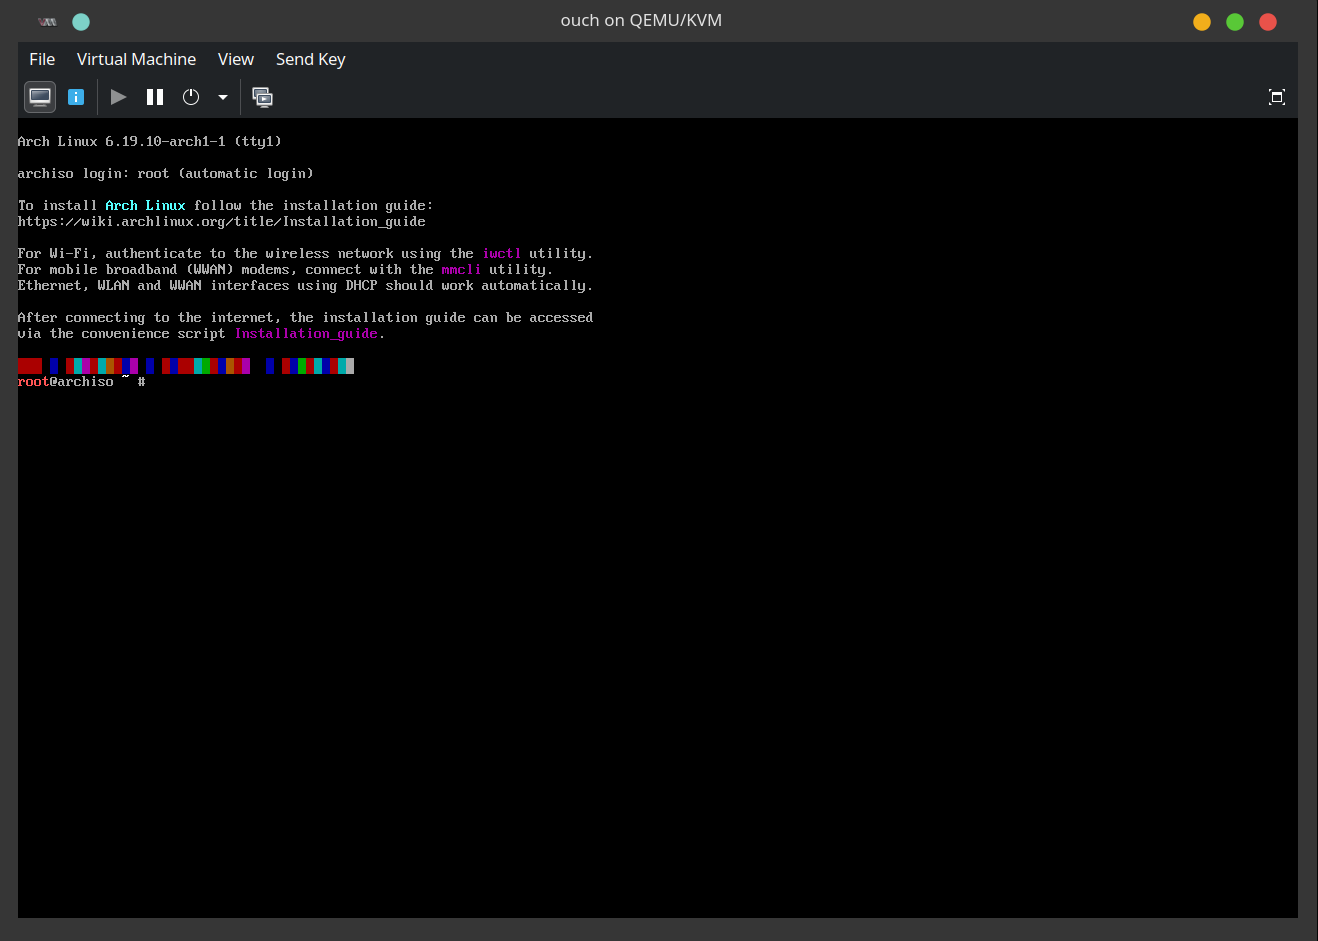
install the arch iso from the arch site, flash this iso into a usb, just start using ventoy at this point.
Make sure secure boot is off in your BIOS and then boot into the usb and lets start :)
u will be welcomed by this…
Configuring wifi is always a timewaste, if you can, use ethernet, otherwise I recommend using your phone as a USB tether (this is always how I install) or u can use iwctl to connect using the wifi-card, ask llm.
partition
lets do lsblk to check out our available disks and then make our desired partitions to it
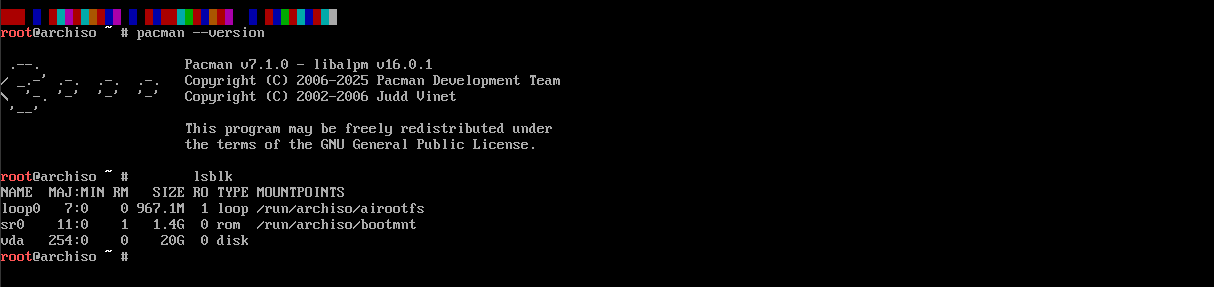
In my case this is vba (since im demoing this on a VM), but on bare-metal you’ll typically either see sdX or nvmeXnY.
i always use cfdisk to partition the disk cuz of its easy to use tui but u can be an elitist with fdisk Now, we can run cfdisk to partition our disks…Select the GPT(guided partitioning table) and
- First make a 1GB partition, set to EFI Partition System(EPS). This will be our /boot/ partition.
- allocate the rest for our root/linux file-system. Finally, select write to apply these changes and select quit. You can run lsblk again to verify you know now have two partitions
formatting
Now we need to format these partitions to their respective needed filesystems.
- The 1GB EFI partition needs to be FAT32, and can be formatted with the following command;
mkfs.fat -F32 /dev/vda1
- Our “root” linux filesystem partition to be ext4;
mkfs.ext4 /dev/vda2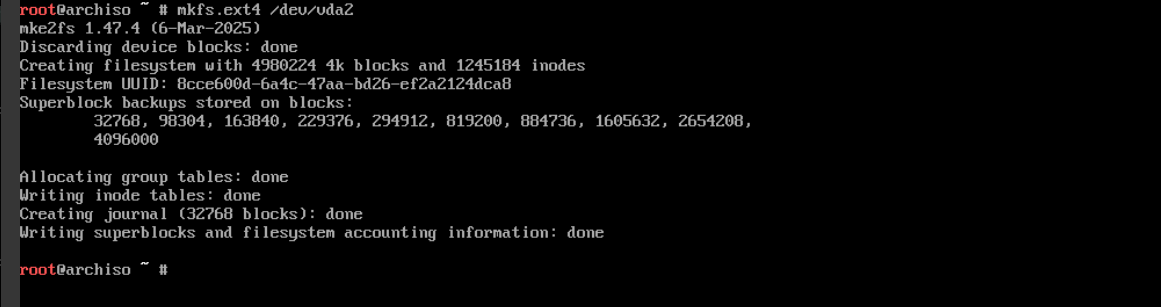
mounting
lets mount the drives with the following commands; make sure you use the right partition numbers! mount the volumes in their corresponding hierarchical order.
mount /dev/vda2 /mntmount --mkdir /dev/vda1 /mnt/bootOnce again, you can verify this was done properly with lsblk

installing kernel and Firmware
now lets use pacstrap(installs packages to a target directory -> a future system that doesn’t exist yet as a running OS) to install the linux kernel and some basic things.
To get our system started, run it with /mnt as the target with the following package names;
pacstrap /mnt base linux linux-firmware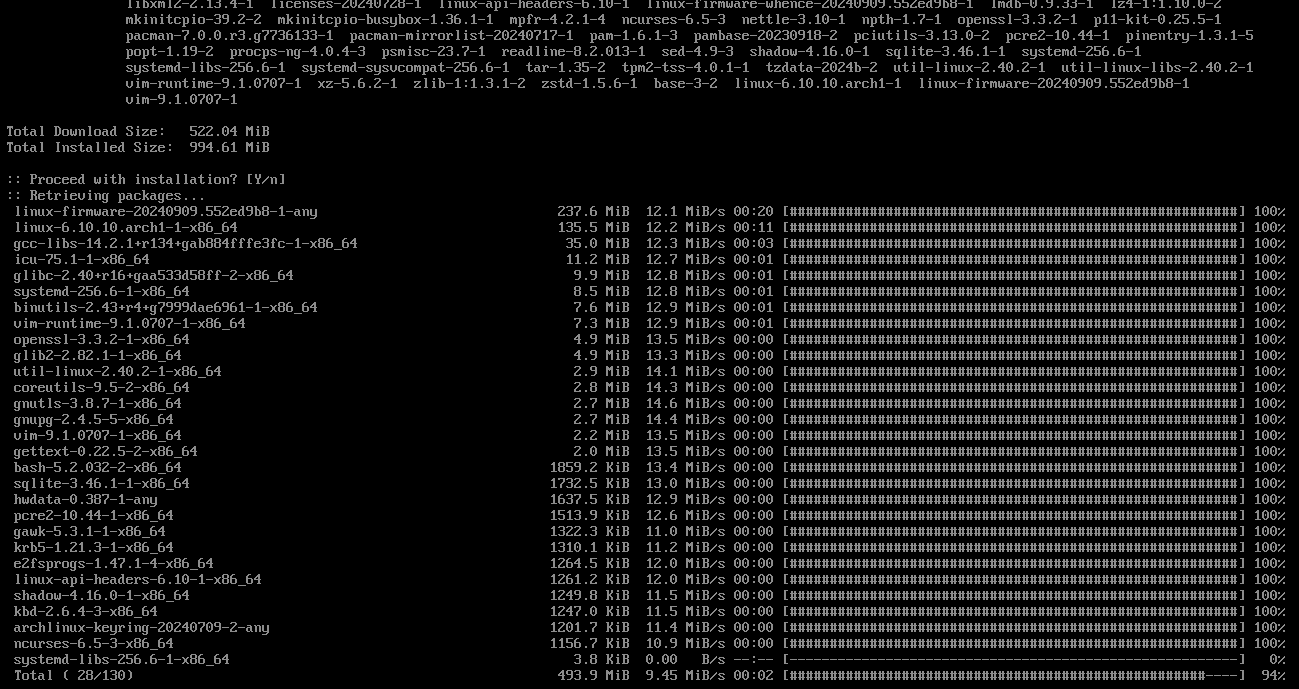
genfstab
Once that’s done, we need to generate the fstab file, it tells arch, how to mount disks, where are they present, when booting.
genfstab -U /mnt >> /mnt/etc/fstabverify the file once, next we move to doing a chroot to the installation;
arch-chroot /mntThe look of your prompt should change to something like this -

timezone, locales and hostname
- Setting the timezone is relatively straightforward, just run after changing region and city;
ln -sf /usr/share/zoneinfo/Region/City /etc/localtimehwclock --systohc
- Set Locales
Edit /etc/locale.gen using vim and uncomment en_US.UTF-8 UTF-8 and other needed UTF-8 locales. install vim first if u haven’t with ( pacman -S vim)
If you’re not familiar with the basics of vim, you should from this moment give up on your dreams and die.
Then, generate the locales by running locale-gen

Then make locale.conf to set your locale;
echo “LANG=en_US.UTF-8” > /etc/locale.conf
- hostname and hosts-file
This is the most important stage of the installation!
just choose your favourite waifu’s name, don’t think too much////
echo "frieren" > /etc/hostname
Then edit your /etc/hosts file to look like this ( use vim btw ) and change the hostname to what u gave earlier
# vim /etc/hosts# Static table lookup for hostnames.# See hosts(5) for details.
127.0.0.1  localhost::1    localhost127.0.1.1  <hostname>.localdomain    <hostname>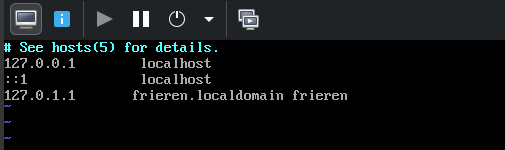
- set up a shitty password using the below cmd-
passwd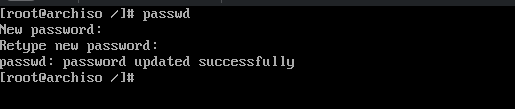
installing desktopENV + stuff.
Bare minimum packages to get you started
Install packages with pacman -S. I reccomend setting up i3 and rofi and dmenu atleast if u are a beginner(don’t i am joking) choose any for install except GNOME(linux people sitting all day in there mom’s basement will hate u)
just write ur desired desktopENV at the end in the command below.
- gnome - gnome gdm
- kde - plasma plasma-wayland-session kde-applications
- xfce4 - xfce4 xfce4-goodies xorg xorg-server
also install some greeter - lightdm or sddm or ly(my current fav) ill go with xfce
pacman -S networkmanager network-manager-applet wireless_tools os-prober base-devel linux-headers reflector git bluez bluez-utils xdg-utils xdg-user-dirs alacritty fastfetch xorg xorg-server xfce4 xfce4-goodies lya bootloader
i used systemd-boot for my bootloader, but u can use any follow this for reference
bootctl install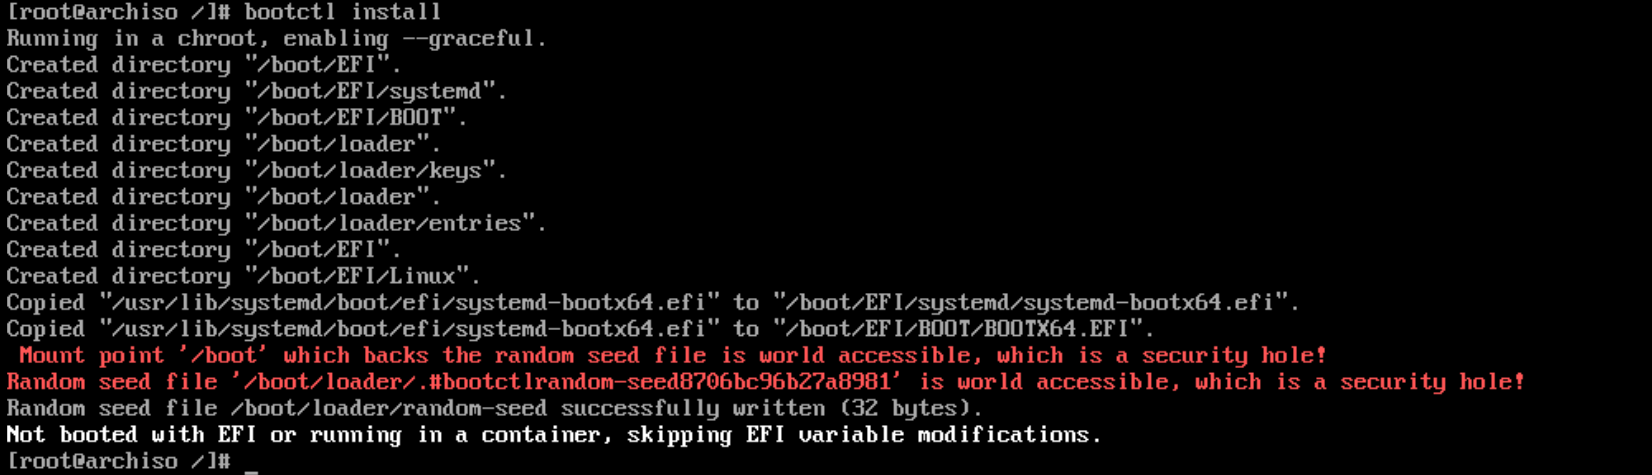
if this fails just check if the /dev/vda is mounted to mnt/boot and repeat the above step
mount | grep boot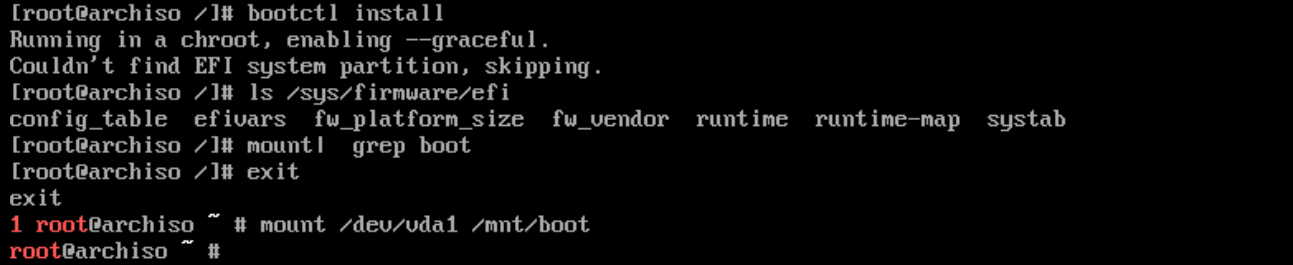
Make up a /boot/loader/entries/arch.conf and copy the config below while adding the uuid of root partition u created (find it with blkid in console)
# do vim /boot/loader/entries/arch.conf from the consoletitle Arch Linuxlinux /vmlinuz-linuxinitrd /initramfs-linux.imgoptions root=UUID=ur_root_UUID rw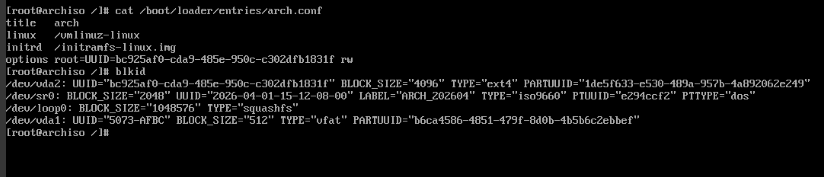
if u wana edit the loader config at /boot/loader/loader.conf to change the timeout settings u can , but lowkei leave it as it is as its of no immediate importance
also add ur keyboard layout in vconsole.conf and rebuild initramfs
echo "KEYMAP=us" > /etc/vconsole.confmkinitcpio -PVerify, if everything looks sane then update:
bootctl statusbootctl update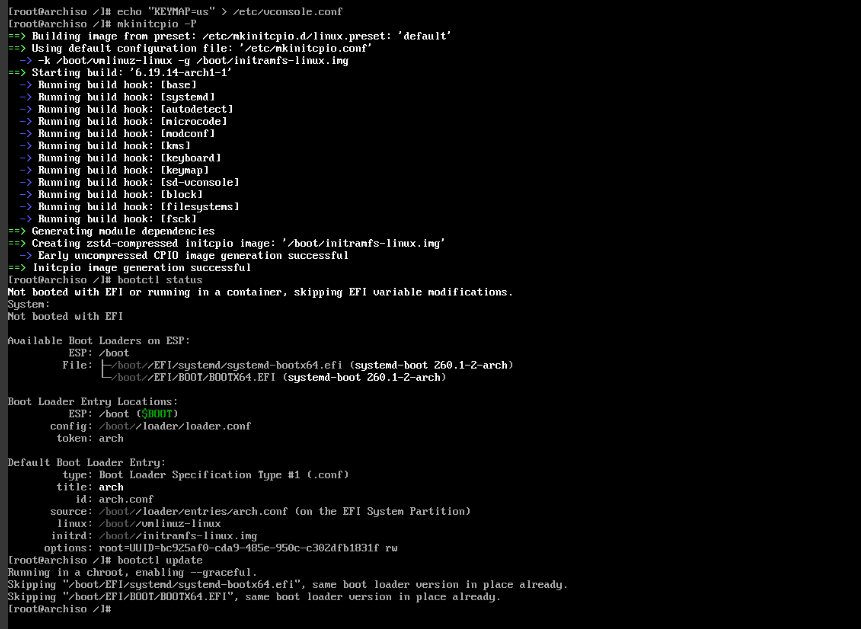
if its not able to detect vmlinuz-linux or the initramfs, check if pacstrap didnt failed -> do ( ls /boot ) if initramfs-linux and vmlinuz-linux are missing , run pacstrap command again after exiting the arch-chroot we did.
zram as swap-space
u can skip this and just boot into ur machine first.
install zram-generator
pacman -S zram-generatorcreate a config file /etc/systemd/zram-generator.conf and paste the following
[zram0]zram-size = ram / 2compression-algorithm = zstdquick stuff
- Quickly enable a couple services so they’re ready to go when we reboot;
systemctl enable NetworkManagersystemctl enable bluetooth
#only if u are using ly.service template otherwise acc to ur dmsystemctl enable ly@tty2
- Add your user to the wheel group(it is basically the list of people who can run sudo)
useradd -mG wheel <username>passwd <username>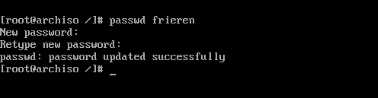
- write exactly the command below to open the sudolist and uncomment the line - %wheel ALL=(ALL:ALL ) ALL
EDITOR=vim visudo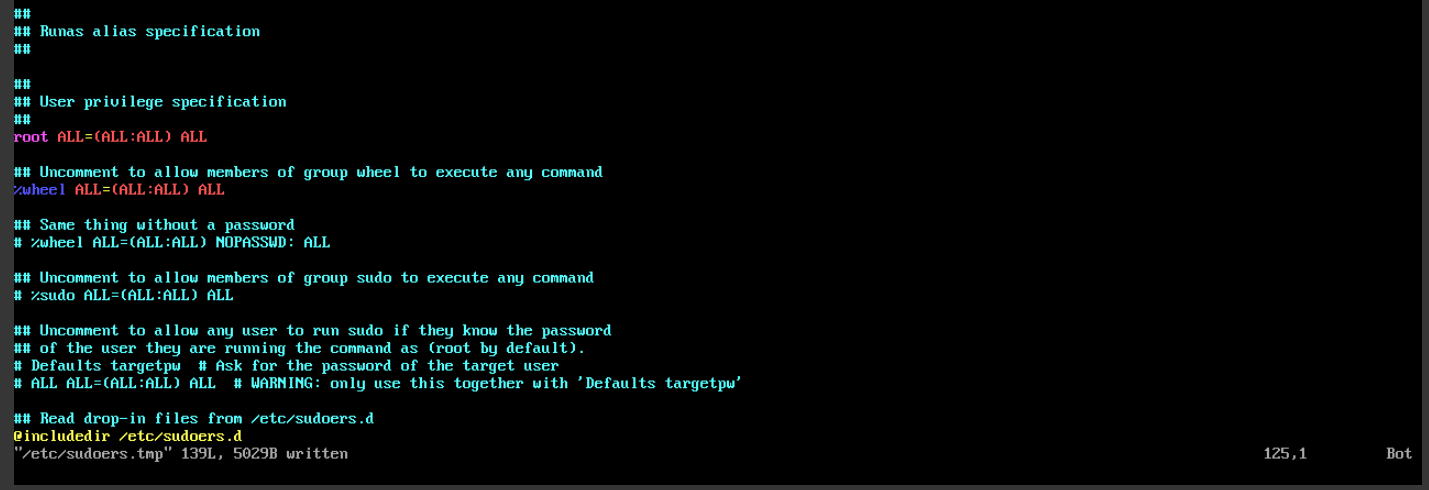
say “Heil, mein Führer”
First, type exit to exit out of chroot into your iso.
Unmount everything (ignore any ‘busy’ messages). Finally, type reboot to restart the system.
umount -aIf everything went well you should reboot into ur bootloader, and from here into a working arch installation : welcome to the club login and enjoy; u earned the right to say - “I use arch btw”
also dont forget to start the zram service after booting in :>
systemctl start systemd-zram-setup@zram0.serviceARCH-101 : “less_CHAD” way
install the arch iso from the arch site, flash this iso into a usb, just start using ventoy at this point.
Make sure secure boot is off in your BIOS and then boot into the usb and lets start :)
u will be welcomed by this…
paste the following for an easy/relaxing install, after that u are smart enough but incase ur not watch any how to install arch youtube vid if u need any help…
sudo pacman -Sy
sudo pacman -S git
git clone https://github.com/archlinux/archinstall.git
cd archinstall
python -m archinstall
then boot into that usb and remember you took the easy road…